
Introduction: The Vision
ToSaVa is more than just a game; it is a personal challenge. On November 16, 2024, I set a goal for myself: to start and finish my first commercial videogame as a solo developer within one year.
As a professor of 3D Animation, Games and Interactive Environments, I guide my students through their own development cycles every day. Coming from a Motion Graphics background, I felt it was only coherent to experience the entire pipeline myself; from the first line of code to the final store publication. As a «multimedia crafter,» I see game development as the ultimate discipline where all creative forms converge.
Prototyping: Finding the «Spark»
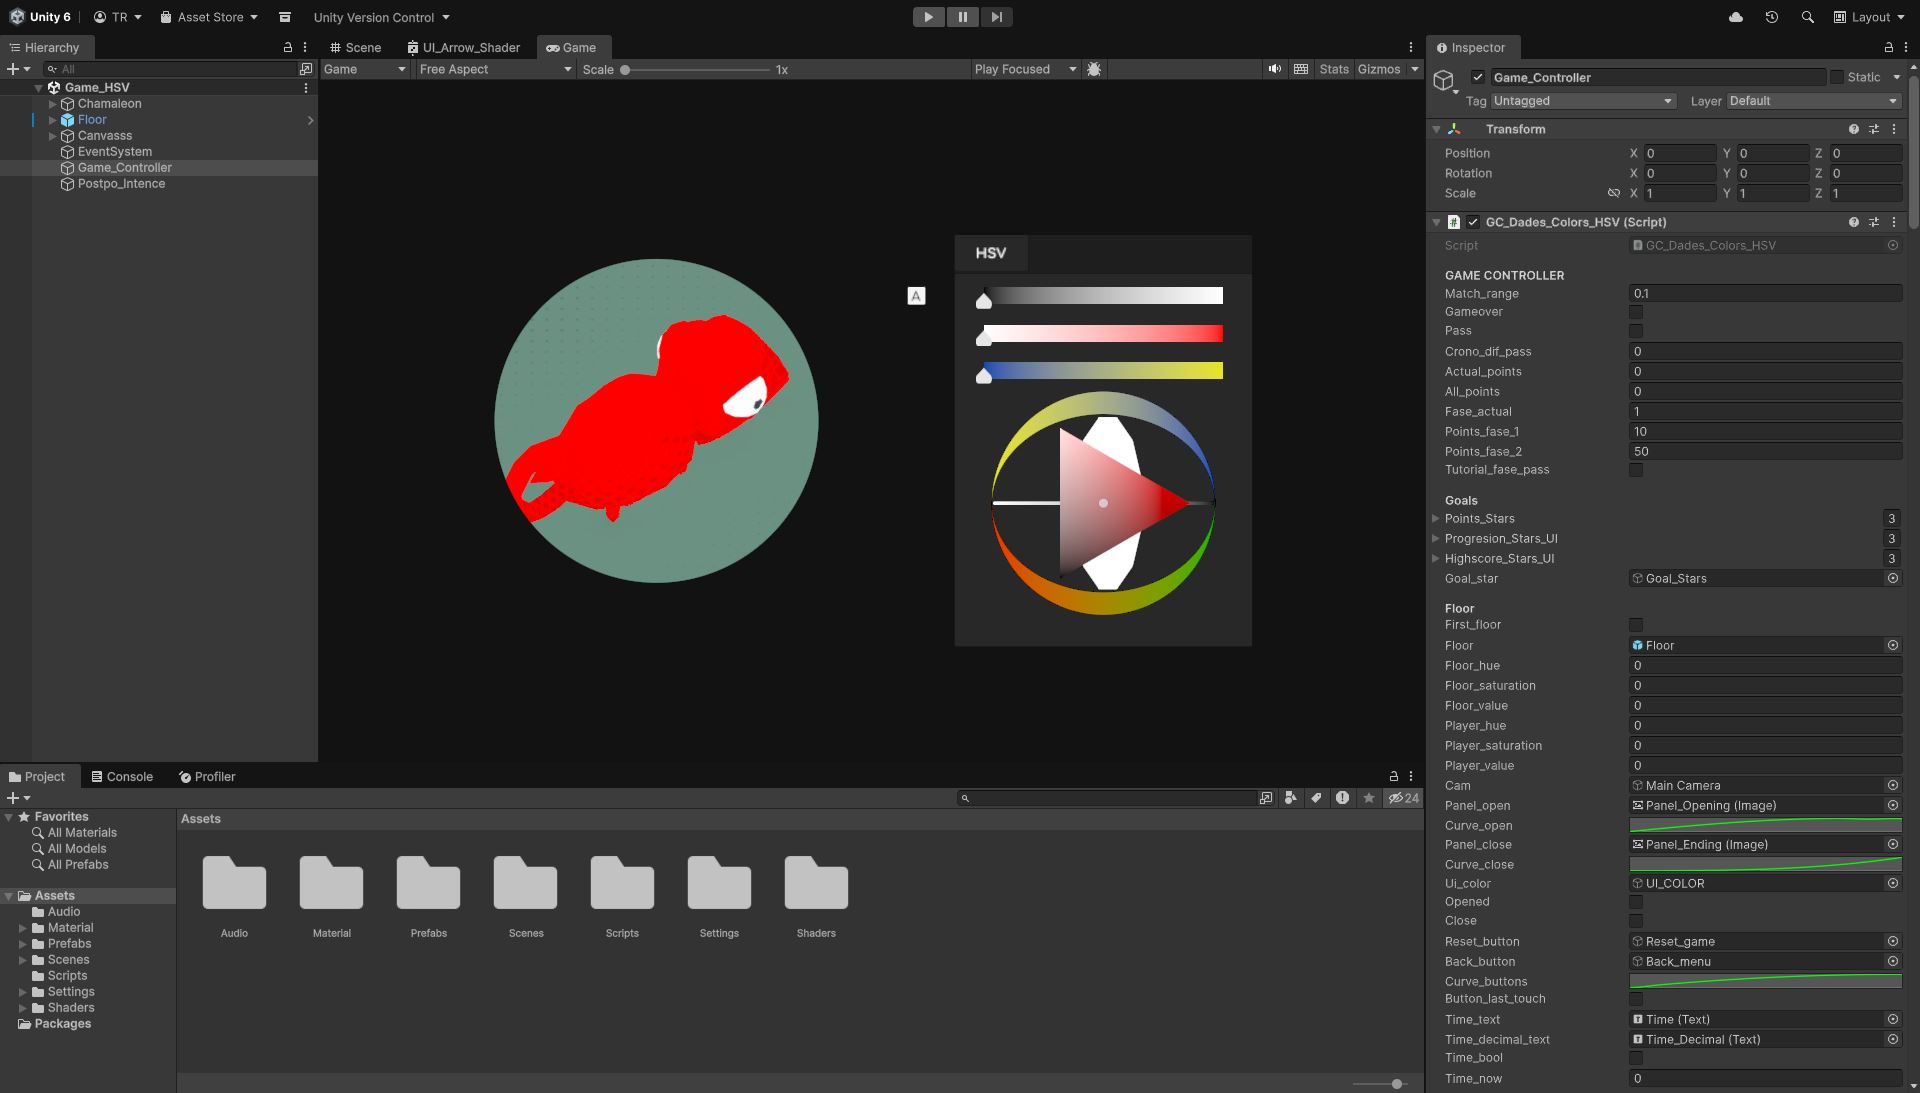
Within less than a month, I had a working prototype that captured the gamecore. It was a crucial moment: in just a few weeks of work, I realized the mechanics made sense and the challenge was genuinely fun. I shared this early build with friends to escape my «tunnel vision,» and the feedback was unanimous: the game had something special.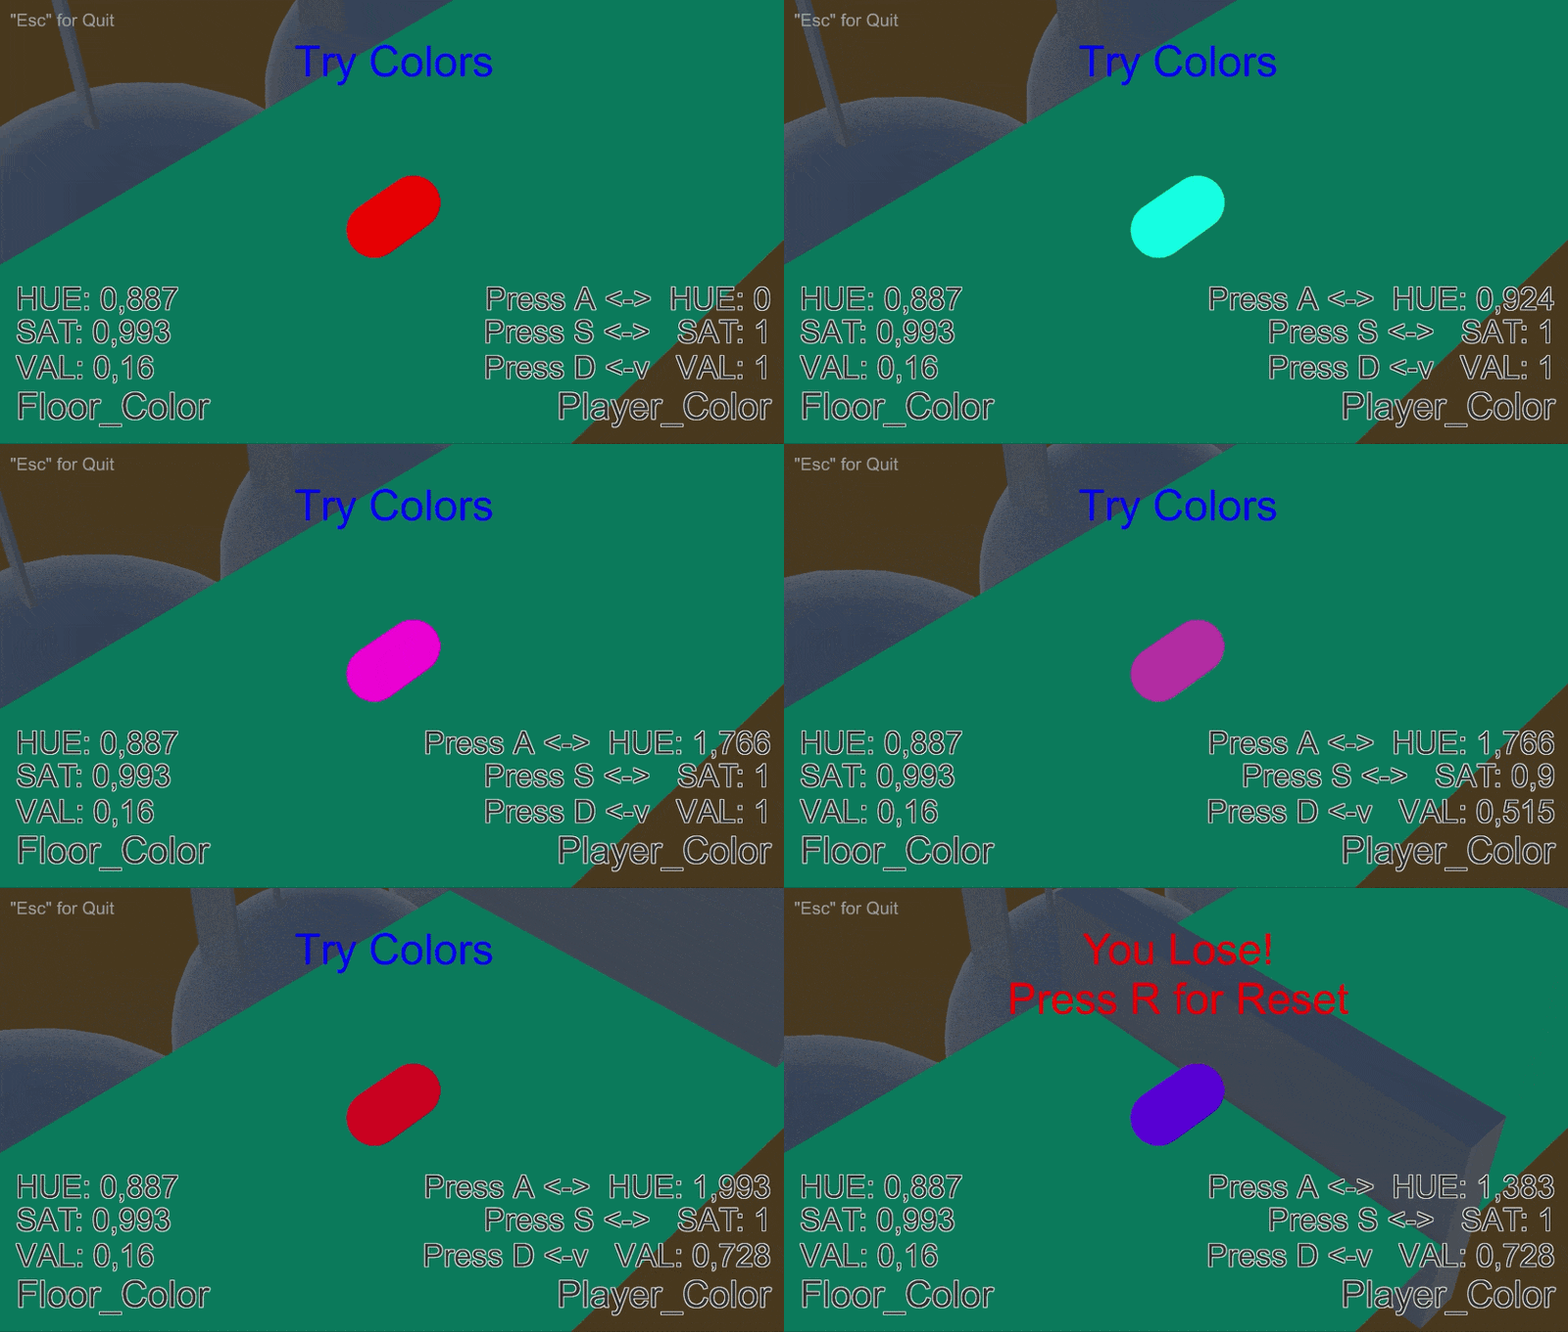
How the Shader works
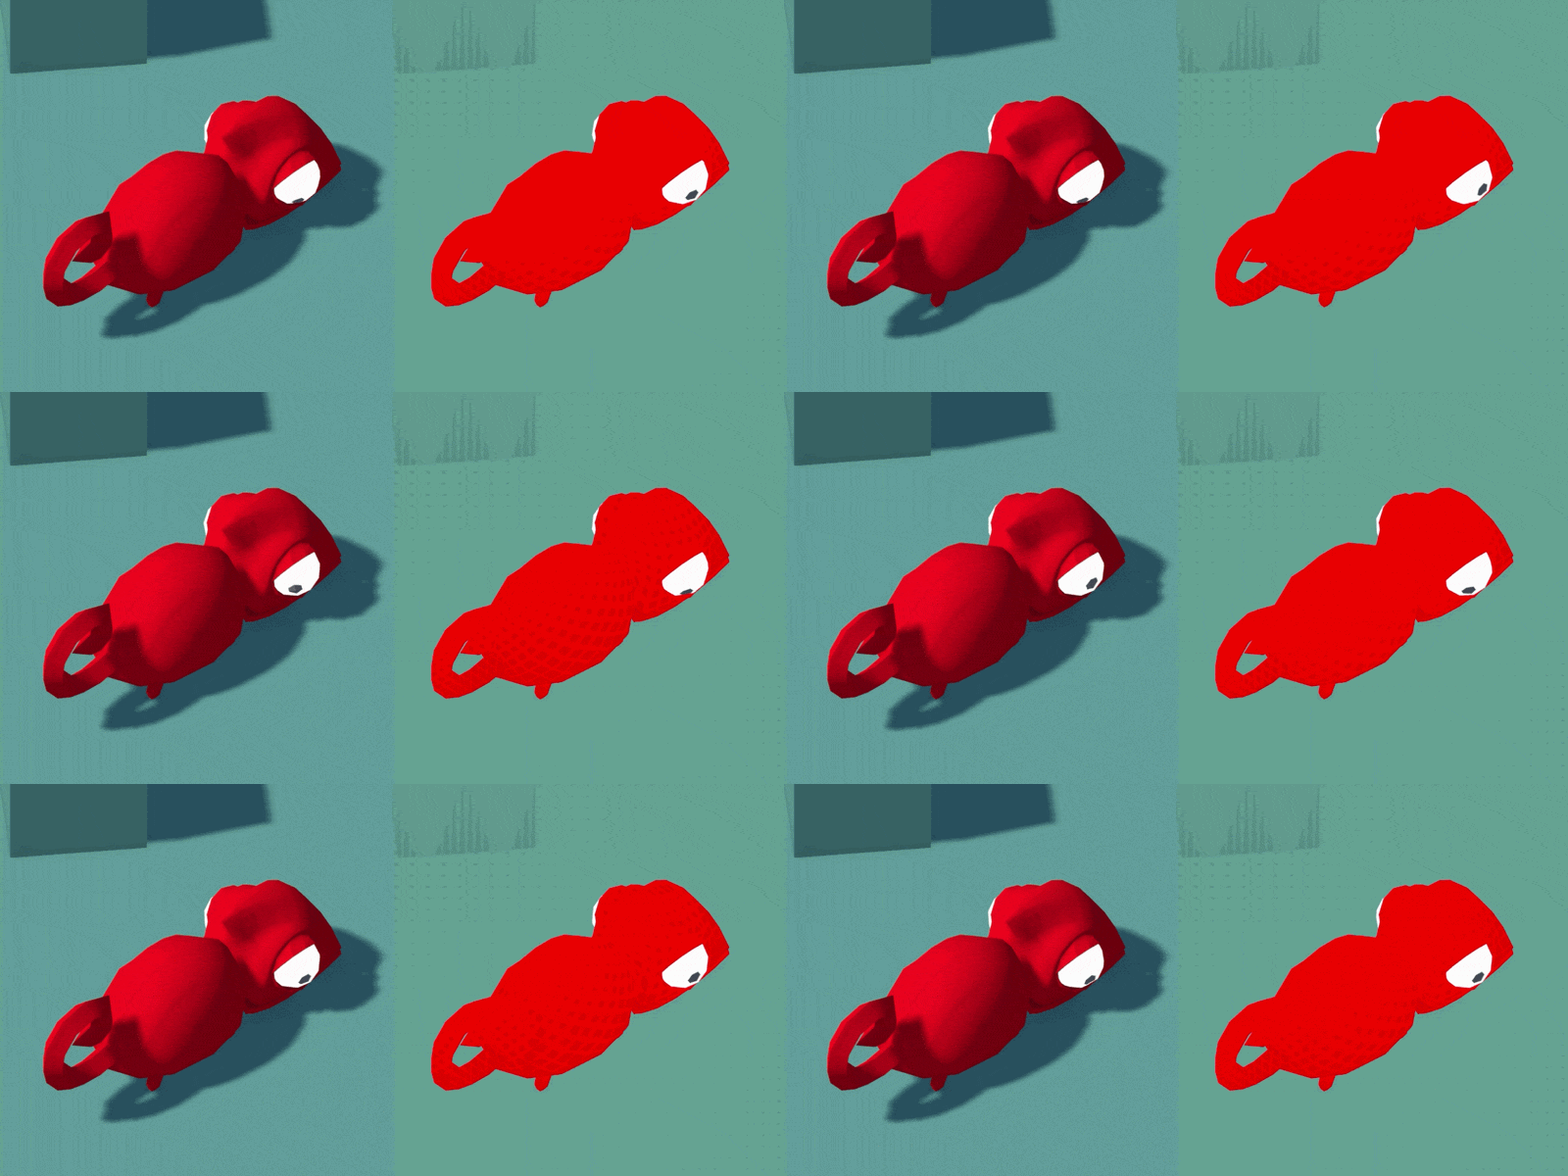
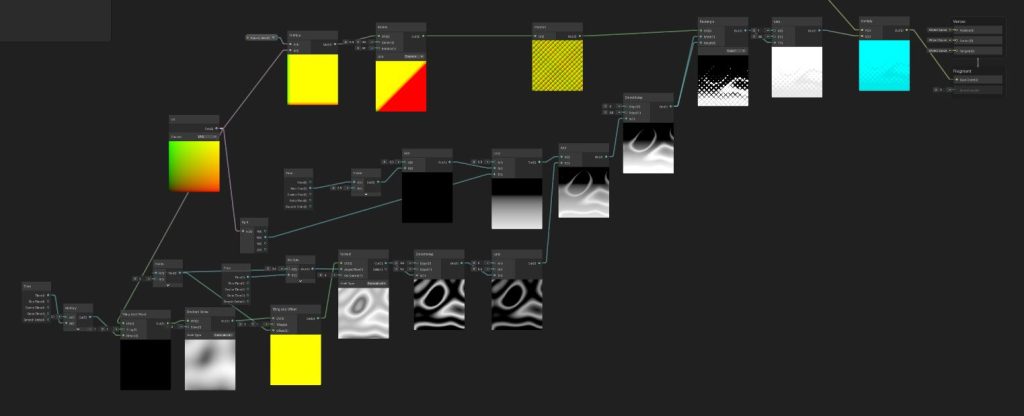
I built a modular system where the base color can be toggled between RGB, HSV, or Lab color spaces to ensure the most accurate blending with the environment. Instead of a static texture, the «volume» is defined by a repeating pattern of rotated rectangles.
To make the effect feel organic and «alive,» I didn’t just tile the shape. I mapped the width and height of these rectangles to a combination of multiple Noise nodes. These noises are automatically animated over time, creating a shifting, shimmering effect that provides depth and surface information without ever muddying the true base color of the character.
A Realistic Mindset: Development without Burnout
One of the most important aspects of this project was its definition as an experiment. I didn’t have the pressure of financial gain or a strict corporate deadline (though I self-imposed a one-year limit).
Having a stable job allowed me to treat this as a learning laboratory. Many developers jump into this high-risk industry without economic stability, which often leads to burnout. By defining my scope clearly and treating it as a hobby-fueled challenge, I enjoyed every step of the process without the stress of «making it» commercially.
The Challenge: Animation through Code
I set some strict (and perhaps «non-optimal») rules for myself:
-
No Keyframes, No Sprite, No Textures: Everything !absolutely everything! had to be generated via code. (no 3D model)
-
Educational Value: The game should reward skill and intuition.
-
Pure Game Design: No tutorials, no text. The player should learn simply by observing and playing.
As a Motion Graphist, my strength is traditional keyframing. However, I wanted to push my programming boundaries and master Unity’s Shader Graph to prove I could «animate» procedurally.
Game Design: Respecting the Player
From the very beginning of development, my core design philosophy for ToSaVa was to respect the player’s intelligence. I wanted to avoid holding their hand like a children’s game, stripping away screen distractions and intrusive text so that the next logical action felt completely intuitive.
Show, Don’t Tell: The UI and Tutorial
Take the main menu, for example. After the title screen, you are greeted by just three abstract symbols contrasting against a pure black background. There are no text labels explicitly saying «Play,» «Achievements,» or «Settings.» You simply click, the menu expands, and its function becomes immediately obvious. To guide the player naturally, the only button with a subtle internal animation is the HSB symbol (the starting game mode). The other two modes (RGB and Lab) are darkened, clearly signaling they are locked without needing a literal padlock icon.
The onboarding process follows this exact same rule. The game doesn’t just drop you into the action at full speed. First, you see the chameleon standing still before the color interface appears. You are restricted to modifying only one of the three color attributes. Only when you adjust it correctly does the next attribute unlock. This happens three times, ensuring you organically understand the controls and make your first perfect match.
Once you get it right, the chameleon starts walking. As you approach the danger zone, the game introduces the core threat without a single word: a camera wiggle and exclamation marks pop up. The floor changes color, the invisible «tutorial» seamlessly ends, and the real game begins.
The Hidden Difficulty Curve
Game progression in ToSaVa happens on two levels. The macro-progression is straightforward: there are three game modes (HSV, RGB, and Lab), ordered by the complexity of mastering them. You can only unlock the next mode by achieving a certain level of perfection in the previous one.
However, the real secret lies in the in-match progression.
During a run, it might seem like there is no difficulty curve because the chameleon’s walking speed remains constant. This is an illusion. The progression is actually hidden within the randomness of the colors and the environmental visual feedback. A single run dynamically scales across three phases:
-
Phase 1: At the start, only one color attribute changes when the floor shifts. To reflect this conceptually, the environmental elements use a Monochromatic color scheme.
-
Phase 2: As you string together correct matches and earn stars, the game adapts. Now, two attributes change at once between floor segments, making it harder to match in the same amount of time. The environment shifts to Complementary colors.
-
Phase 3: If you consistently achieve perfect matches, you trigger the final phase. All three color attributes change drastically. The environment visually reflects this ultimate challenge by switching to a Triadic color scheme.
By linking the color harmony of the background to the hidden difficulty modifier, I was able to create a dynamic progression system that gives constant visual feedback to the player, all without relying on a single line of text.
Pre-production and Scope Management
Early on, I realized I had to be a realist. ToSaVa was initially conceived as a much larger game with multiple animals, various biomes, and complex mechanics (like catching flies to gain points or color-coded platforming over rivers).
However, life happens, and I couldn’t dedicate as much time as I originally hoped. This is where modular design saved the project. I prioritized the «must-haves» and kept the extras as modules that could be dropped without breaking the game’s core. Finishing an «imperfect» game is always better than never finishing a «perfect» one.
Finishing an «imperfect» game is always better than never finishing a «perfect» one.
Technical Deep Dive
1. Visual Style & The Dithering Solution
In a 3D game, you usually rely on lighting and shadows to define volume. However, in ToSaVa, the chameleon must mimic the floor color perfectly. Standard shadows or Cell Shading created color gradients that confused the player.
-
The Problem: No shadows = No volume (flat shapes). Shadows = Wrong color information.
-
The Solution: I developed a moving diamond pattern shader using Shader Graph. This creates a «dithering» effect that defines the 3D volume while allowing the player to compare the chameleon’s true color with the floor at all times.
2. Procedural Animation: The Power of Math
All time, ToSaVa is driven by code using Lerps and Trigonometry (Sine and Cosine).
Instead of playing an animation clip, I use mathematical oscillations to rotate the head, legs, and body. By offsetting the phase of a Sine wave (adding to the value) or changing its frequency (multiplying), I achieved a fluid, organic movement that responds dynamically to the game state.
Animation Control: Beyond Linear Transitions
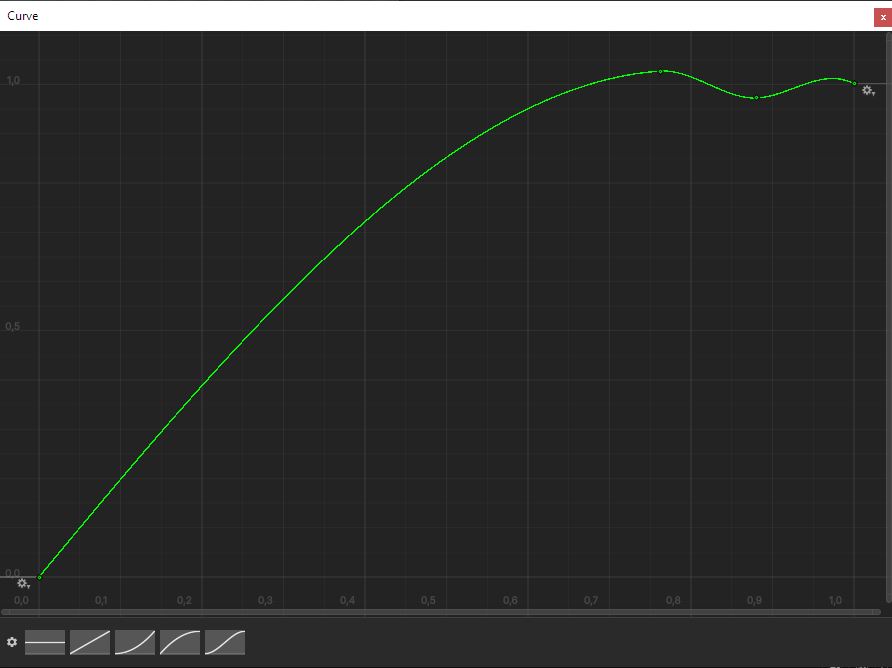
As an animator, having absolute control over Ease In/Out is non-negotiable. While Lerp is a powerful tool for transitions, it has a major limitation: by itself, it is purely linear and lacks the organic feel of custom curves.
To solve this, I integrated Unity’s AnimationCurve variable into my scripts. This feature provides a visual curve editor directly in the Inspector, allowing me to map transitions from 0 to 1 with precise easing. It is perfectly compatible with Lerp, as I can use the curve’s evaluated value as the «t» (interpolation) parameter.
A clear example of this is the animation when the player collects a star and it flies towards the UI score:
points_Stars[1].transform.position =
Vector3.Lerp(points_Stars[1].transform.position,
progresion_Stars_UI[1].transform.position,  curve_close.Evaluate(t));
3. UI and Multi-platform Porting
Even the UI was built using Shader Graph nodes. From the beginning, I designed the inputs to be modular, allowing the game to be easily ported from PC to Android.
The beauty of Shader Graph is that it allows me to create different types of exposed variables and easily access them via C# scripts. This gave me the freedom to dynamically scale, change colors, or even deform the UI entirely through code.
Fun fact: ToSaVa stands for 'To, Saturació, Valor', which is Catalan for Hue, Saturation, Value. Also, my name is Tomàs Sala, and is my first game as a SoloDev, it could be like " Version Alpha". Both are ToSaVa...
The Odyssey of Publishing: Steam vs. Google Play
Finishing the game was just the first step. Then came the «Store Odyssey.»
-
Steam: I was impressed by their documentation and developer tools. Even with zero marketing, Steam’s «discovery queues» gave the game visibility, leading to sales even in China. It’s clearly the #1 platform for a reason.
-
Google Play: This was much more difficult. My decision to make the game «Paid» (to avoid intrusive ads) doesn’t work well on mobile. Additionally, Google’s requirement for a 12-person «real user test» was a significant hurdle for a small indie dev.
Conclusion: What Success Looks Like
I am incredibly proud of ToSaVa. Success, for me, wasn’t about the revenue, it was about the feeling of watching someone else play and seeing them truly enjoy the experience I built from scratch.
Experiencing the entire lifecycle of a game from the initial spark of an idea to the technical hurdles of Steamworks and post-launch updates; has been a transformative journey. Living this process from start to finish has profoundly improved my perspective as a teacher; I now feel much more equipped to guide others through the realities of development and far better prepared to tackle even larger, more ambitious projects.
I’ve met my goals, sharpened my technical skills, and I’m already itching to start my next solo-dev adventure.